One tap, three possible results
The bar has a narrow blue band near its centre, a thin middle zone on each side of it, and open space beyond. The game reads the marker's position at the instant of your tap and settles the exchange from that alone.
| Tap lands in | Who strikes | What settles it |
|---|---|---|
| Open space, early or late | Your opponent, first | Their hit lands before you move |
| The middle zone | Both chickens together | Whichever has the higher stats |
| The blue band | Your chicken, alone, at full damage | No comparison happens |
Why a cheaper chicken can win the opening
Stats only matter when both chickens strike at once. A blue-band tap skips that comparison entirely, so a modest rooster with a clean tap can open on an expensive one that was tapped carelessly.
A Monkey 4 Evolve carries 9,400 attack, the top of the roster, and it still gives up the opening to a well-timed Manok na Itim when its own tap misses. The attack number never gets used in that exchange.
That is why upgrades and timing are different tools. Upgrades improve the trades you cannot avoid; timing takes trades out of the fight. Learning the bar first makes every later Pera spent on upgrades go further.
Look at the marker, not the rooster
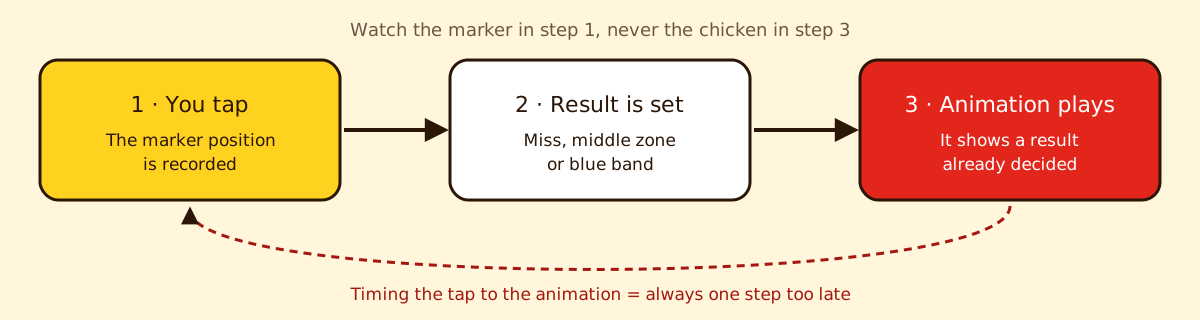
The attack animation plays after the game has already recorded where the marker stopped. If you time your tap to your chicken's wind-up, you are reacting to a result that is already decided, and the tap lands late every time.
Keep your eyes on the marker as it approaches the band and tap on its position. The strike bar is only the opening of the fight; choosing a first rooster, earning Pera and sizing bets come after it, and the full loop is covered in this guide on how to play Manok Na Pula.
Fast and durable chickens forgive different things
The band is not the same width for every chicken. Faster chickens get a slightly wider blue band; slow, heavy ones get a narrower band but survive the free hit a missed tap hands over.
| Chicken type | Blue band | A missed tap costs | Learn on it? |
|---|---|---|---|
| Fast | Slightly wider | A moderate hit | After the basics hold |
| Durable, high HP or defense | Narrower | Little, it absorbs the opening | Best start |
| Fragile, high attack | Varies | Often the whole fight | No |
Sarimanok, with 12,300 HP, a shield and a slow heal, shrugs off a bad opening better than almost anything, which makes it a comfortable chicken for learning the band. The bar itself never changes between arenas or modes, Tournament included.
Nerves or lag?
Online, two things move your tap away from the band. Pressure from a bet and a rank pulls taps early. A weak Wi-Fi or mobile connection can register a correct tap after the marker has moved on. Misses that land early are nerves; misses that land late and only online point to the connection, so switch to stable Wi-Fi before ranked play.
A three-stage drill
- Find the band offline. Watch only the marker and call the zone out loud before the result shows. Offline fights carry no account risk and cost nothing to lose.
- Make it consistent. Stay offline and change opponents often until the blue band comes up in most fights in a row.
- Go online small. Take the tap online with small bets and raise them only once your rate holds under pressure.
Signs you are ready for online matches
Until all three hold, each online match is practice that costs Pera and rank.